
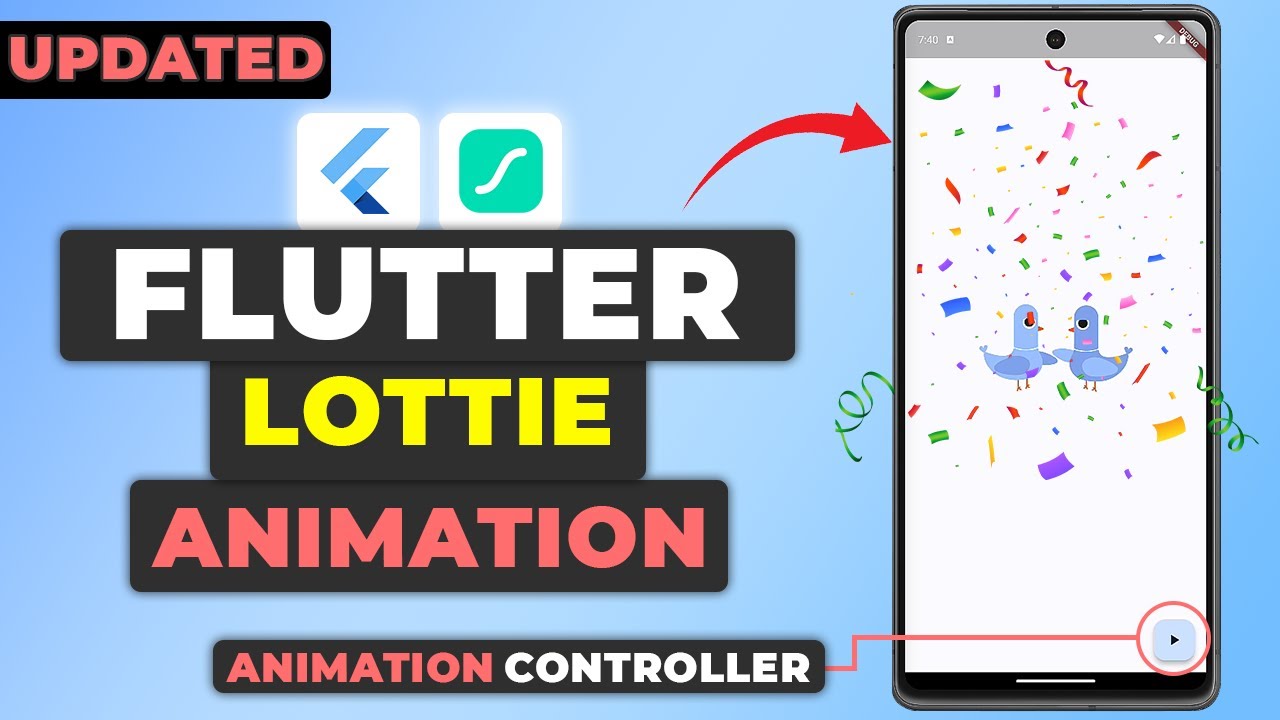
In the dynamic world of mobile app development, animations can significantly enhance the user experience by providing visual feedback, guiding through tasks, and adding a layer of sleek professionalism. Flutter, an increasingly popular framework by Google, allows developers to build beautiful native apps on multiple platforms with a single codebase. This post will delve into how to integrate sophisticated animations into your Flutter applications using Lottie, a powerful tool that renders animation files in JSON format.
If you prefer watching a video tutorial on flutter lottie animation, here is a link to that.
Introduction to Lottie Animation and Its Importance in Flutter
Lottie is a library initiated by Airbnb that parses Adobe After Effects animations exported as JSON files with Bodymovin and renders them natively on mobile and web platforms. For Flutter developers, Lottie files provide a lightweight and flexible solution to incorporating complex animations without the overhead of traditional image sequences.
Setting Up Lottie in Your Flutter Project
To get started with Lottie animations in Flutter, you first need to include the Lottie package in your project. This process begins with adding the Lottie package to your pubspec.yaml file. Here’s how you can do it:
- Open your Flutter project in your IDE or code editor.
- Navigate to the
pubspec.yamlfile. - Under
dependencies, add the following line:dependencies:lottie: ^1.2.1Replace1.2.1with the latest version available. - Save the file and run
flutter pub getin your terminal or command prompt to install the Lottie package.
The lottie library can be downloaded from here.
This simple addition allows your Flutter application to decode and display animations from Lottie’s vast library.
Preparing the Groundwork: Setting Up Assets Folder
Before you can dive into the exciting world of animations, it’s essential to set up an assets folder in your project. This folder will hold all the animation files (JSON format) that you plan to use.
- Create an
assetsfolder at the root of your project. - Inside
assets, create a subfolder namedanimationswhere you will store all your Lottie JSON files.
Next, you must declare this folder path in your pubspec.yaml to make the animations available to your application:
flutter:
  assets:
    - assets/animations/
With this setup, your Flutter app now knows where to look for the animation assets.
Obtaining Lottie Animations
Lottie animations can be sourced directly from LottieFiles, where you find a plethora of free and premium animations suitable for various aspects of app interfaces.
Creating an Account and Exploring Animations
- Sign up or log in at LottieFiles to access animations.
- Once logged in, navigate to the free community animations section where you can use animations at no cost.
Suppose you want an animation that depicts a “waiting” status. You can:
- Search for “waiting” in the search bar.
- Browse through the animations and select one that fits your app design.
- You can customize the color palette of the animation to match your app theme directly on LottieFiles before downloading.
You can find the animtion used in this tutorial here.
Downloading and Organizing JSON Files
After adjusting the animation:
- Click
Downloadand choose to save the animation to your workspace. - Navigate back to your project and move the JSON file to the
assets/animationsfolder you prepared earlier.
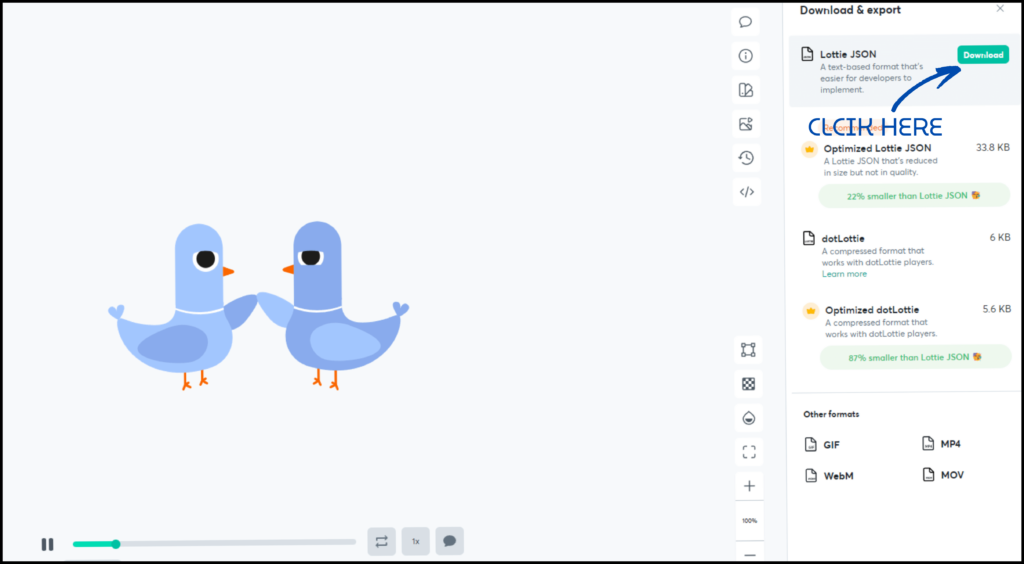
You now have your chosen animations saved and correctly placed in your project structure.
Implementing Lottie Animation in Flutter
With Lottie and your animations ready, let’s explore how to render them within your Flutter app.
Basic Animation Rendering
To display a basic animation:
- Use the
Lottiewidget available from the Lottie package. - Specify the source of the animation file using the
Lottie.assetmethod.
Here’s an example of how to integrate a Lottie animation within the UI:
Widget build(BuildContext context) {
  return Center(
    child: Lottie.asset('assets/animations/waiting.json'),
  );
}
This snippet will render the “waiting” animation at the center of the screen.
Customizing Animation Behavior
Lottie provides several options to customize how an animation is displayed:
- Repeat: Determine if the animation should loop.
Lottie.asset('assets/animations/waiting.json', repeat: false)- Reverse: Play the animation in reverse.
Lottie.asset('assets/animations/waiting.json', reverse: true)- Change Size: Adjust the width and height of the animation.
Lottie.asset('assets/animations/waiting.json', width: 200, height: 200)Adjust these parameters based on your application’s needs to optimize user experience.
Advanced Techniques: Controlling Animations Programmatically
While Lottie animations can run autonomously, controlling them programmatically can enhance interactivity. For example, triggering an animation with a button press or after a specific action by the user can make your app more dynamic and engaging.
Adding a Controller for Animations
To control animations programmatically, you need to integrate an animation controller:
- Define a stateful widget and include
SingleTickerProviderStateMixin. - Initialize the animation controller in the
initStatemethod and set its duration.
class _HomePageState extends State<HomePage> with SingleTickerProviderStateMixin {late final AnimationController _controller;

  @override
  void initState() {
    super.initState();
    _controller = AnimationController(
      vsync: this,
      duration: Durations.extralong4,
    );
  }
  @override
  void dispose() {
    _controller.dispose();
    super.dispose();
  }
  @override
  Widget build(BuildContext context) {
    return Scaffold(
      body: _buildUI(),
      floatingActionButton: FloatingActionButton(
        onPressed: () {
          var ticker = _controller.forward();
          ticker.whenComplete(() {
            _controller.reset();
          });
        },
        child: Icon(
          Icons.play_arrow,
        ),
      ),
    );
  }

  Widget _buildUI() {
    return Stack(
      children: [
        Center(
          child: Lottie.asset(
            "assets/animations/ducks.json",
            repeat: true,
            width: 250,
            height: 250,
          ),
        ),
        Lottie.asset(
          "assets/animations/confetti.json",
          controller: _controller,
          width: MediaQuery.sizeOf(context).height,
          height: MediaQuery.sizeOf(context).width,
          fit: BoxFit.cover,
          repeat: false,
        ),
      ],
    );
  }
}
Triggering and Resetting Animations
You can link the animation to interactive elements like a FloatingActionButton:
- Add a FloatingActionButton to your Scaffold.
- Set its
onPressedto control the animation’s behavior, like starting and resetting.
FloatingActionButton(
        onPressed: () {
          var ticker = _controller.forward();
          ticker.whenComplete(() {
            _controller.reset();
          });
        },
        child: Icon(
          Icons.play_arrow,
        ),
      )
This setup allows the animation to play when the button is pressed and reset for a replay.
Get Source Code for free:
Conclusion: Flutter Lottie Animation Tutorial
Integrating Lottie animations into your Flutter applications can significantly boost the user interface, making it lively and engaging. By following the steps outlined—from setting up the Lottie package in your Flutter project to controlling animations programmatically—you can implement visually appealing animations that enhance the overall user experience. Whether for simple indicators like loading animations or complex sequential animations, Lottie offers a scalable solution to enrich your apps without compromising on performance.
As you continue to explore the potential of animations in mobile app development, remember that the key to effective animation is subtlety and purpose. Each animation should serve a clear function, improving the user’s interaction with the app rather than simply serving as an aesthetic enhancement.


Leave a Reply