
In today’s tutorial, I’m going to show you how to change your app icon and display name for both iOS and Android in Flutter. The concepts covered here also apply to desktop applications developed with Flutter. All you need is the icon image that you want to use for your app, and you’re ready to go. Let’s dive into the steps.
If you prefer watching a video tutorial here is a link to that.
Overview
We’ll use the flutter_launcher_icons package to change the app icons and display names for both iOS and Android. This package simplifies the process of generating and configuring the necessary settings for multiple platforms.
Prerequisites
Before starting, ensure you have:
- Flutter installed
- Basic knowledge of Flutter and Dart
- The icon image you want to use for your app
Setting Up the Project
Step 1: Add Dependencies
First, head over to pub.dev and navigate to the flutter_launcher_icons package. Copy the dependency, then open your pubspec.yaml file and add it under the dev_dependencies section:
dev_dependencies:
  flutter_launcher_icons: ^0.9.2
To get the dependency click here.
Save the file and run flutter pub get to install th package:
flutter pub getThis installs the flutter_launcher_icons package, which allows us to override the icons for iOS, Android, macOS, and Windows.
Step 2: Configure Icons
Next, define a specific section within your pubspec.yaml file to configure how the icons are generated and where the icon image is located. Add this section at the end of your pubspec.yaml file:
flutter_icons:
  android: "launcher_icon"
  ios: true
  image_path: "assets/icons/icon.png"
  adaptive_icon_background: "#42a5f5"
  adaptive_icon_foreground: "assets/icons/icon-foreground.png"
Make sure to create the necessary folder structure and place your icon image in the specified path:
assets/
└── icons/
    └── icon.png
You can use websites like easyappicon.com to generate your app icons.
Generating Icons
Once the configuration is done, run the following command to generate the icons for both iOS and Android:
flutter pub run flutter_launcher_iconsThis command uses the flutter_launcher_icons package to generate the necessary icon files and settings for both platforms.
Changing the App Name
For Android
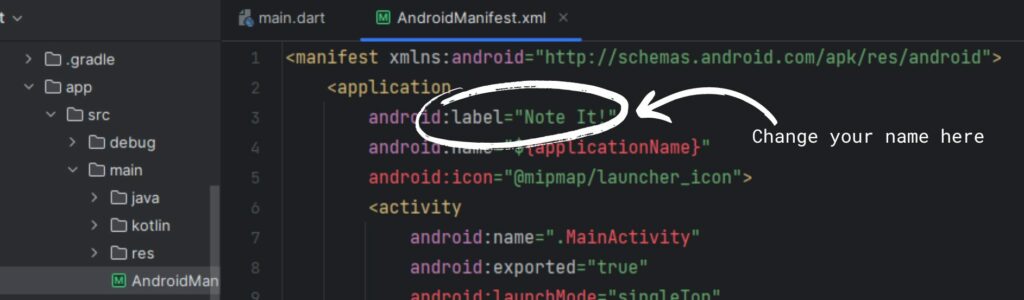
To change the app name on Android, open AndroidManifest.xml located at android/app/src/main/AndroidManifest.xml and modify the android:label property:
<application
    android:name="${applicationName}"
    android:label="YourAppName"
    android:icon="@mipmap/ic_launcher">
    ...
</application>
Replace "YourAppName" with the desired name of your app.
For iOS
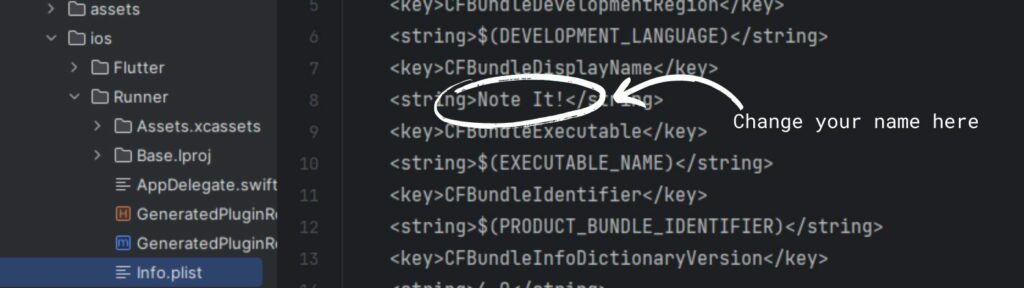
To change the app name on iOS, open Info.plist located at ios/Runner/Info.plist and modify the CFBundleName property:
<key>CFBundleName</key>
<string>YourAppName</string>
Replace "YourAppName" with the desired name of your app.
Running the Application
With everything set up, run your application using flutter run. You should see the updated app icon and name on both iOS and Android.
flutter runAdditional Configuration for Desktop
If you’re developing a desktop application for Windows or macOS, the configuration can also be set up in the same pubspec.yaml file. Check the flutter_launcher_icons package documentation on pub.dev for detailed instructions.
Get Source Code for free:
Conclusion
In this tutorial, we learned how to change the app icon and display name for a Flutter application using the flutter_launcher_icons package. This package simplifies the process for multiple platforms, ensuring your app looks great on any device. If you found this tutorial helpful, please leave a thumbs up and subscribe to my channel for more Flutter tutorials.
Happy coding!


Leave a Reply