
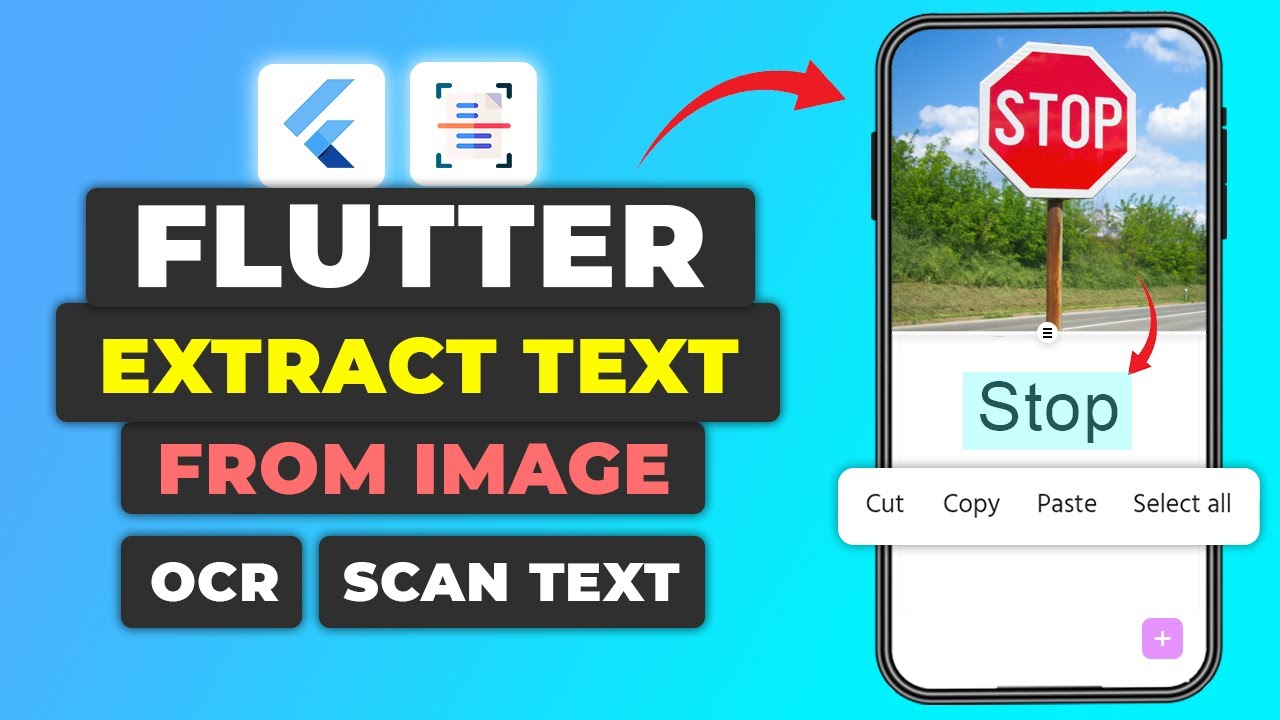
Text recognition technology has revolutionized the way we interact with the digital world, allowing us to extract text from images and convert it into editable and searchable data. This technology is particularly useful in numerous applications, from automating data entry processes to enhancing user interactivity in apps. In this detailed guide, we will dive deep into implementing text recognition capabilities within a Flutter application, using Google’s ML Kit and the gallery_picker package to create a robust text recognition tool.
Overview of Text Recognition Capabilities in Flutter
Text recognition, or optical character recognition (OCR), involves detecting text within images and converting it into machine-encoded text. Flutter, a popular framework by Google, allows developers to build natively compiled applications for mobile, web, and desktop from a single codebase. It supports implementing text recognition with its rich set of packages and robust community contributions.
Application Functionality
The app we are building will feature a user-friendly interface where users can:
- Tap a Floating Action Button to open their phone’s gallery.
- Select an image containing text.
- Use the text recognition algorithm to detect and decipher the text within the selected image.
For demonstration purposes, we’ll explore two examples:
- Detecting abbreviated text like “STOP” from a stop sign image.
- Extracting a full block of text from a complex image like a handwritten poem.
These examples will illustrate the app’s capability to handle both simple and complex text recognition tasks.
Setting the Stage: Preparing Your Flutter Project
To get started, we’ll first need to set up our Flutter project and configure the necessary dependencies. Begin by creating a new Flutter project and removing the default MyHomePage class and its corresponding state class from the main.dart file. Next, create a new folder called “pages” and within it, a new file named “home_page.dart”. In this file, we’ll create a new stateful widget called “HomePage”.
class HomePage extends StatefulWidget {
  const HomePage({super.key});

  @override
  State<HomePage> createState() => _HomePageState();
}
Incorporating Essential Dependencies
To enable text recognition in our Flutter application, we need to integrate the following dependencies:
Google ML Kit Text Recognition: This is the primary package that facilitates text recognition functionalities. It provides advanced OCR capabilities that are well-optimized for mobile environments. To download this dependency click here.gallery_picker: This package allows access to the phone’s gallery, enabling users to pick images for text recognition purposes. To download this dependency click here.
dependencies:
  flutter:
    sdk: flutter
  google_mlkit_text_recognition: ^0.13.0
  gallery_picker: ^0.5.1
Both packages are essential for building our text recognition app and integrating them involves simple updates to the project’s dependency list.
Once done, run flutter pub get to install the package.
flutter pub getSetup for iOS
The setup process on iOS involves a few detailed steps to properly configure the environment and permissions:
Updating the Podfile
- First, navigate to the iOS folder in your Flutter project and locate the Podfile.
- Uncomment the line
platform :iOS, '12.0'to specify the minimum iOS version.
# platform :ios, '12.0'
- Within the
post_installblock in the Podfile, add the below provided snippet which typically include framework linking and additional flags necessary for ML Kit to function optimally.
installer.pods_project.build_configurations.each do |config|
  config.build_settings["EXCLUDED_ARCHS[sdk=*]"] = "armv7"
  config.build_settings['IPHONEOS_DEPLOYMENT_TARGET'] = $iOSVersion
end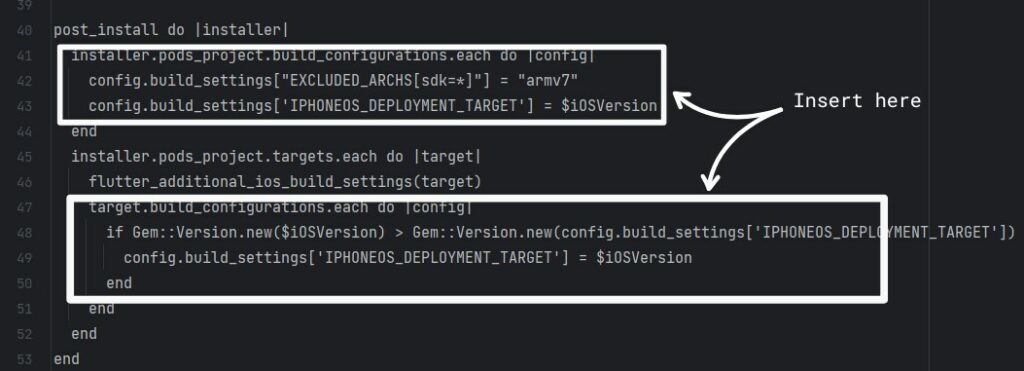
target.build_configurations.each do |config|
  if Gem::Version.new($iOSVersion) > Gem::Version.new(config.build_settings['IPHONEOS_DEPLOYMENT_TARGET'])
    config.build_settings['IPHONEOS_DEPLOYMENT_TARGET'] = $iOSVersion
  end
end
Configuring Permissions
- Open the
info.plistfile and add permissions for accessing the photo library. This step is crucial as it allows the app to interact with the gallery. - Ensure the descriptions for each permission clearly explain why the app requires access, as this is a requirement for app submission to the App Store.
<key>NSPhotoLibraryUsageDescription</key>
<string>Privacy - Photo Library Usage Description</string>
<key>NSMotionUsageDescription</key>
<string>Motion usage description</string>
<key>NSPhotoLibraryAddUsageDescription</key>
<string>NSPhotoLibraryAddUsageDescription</string>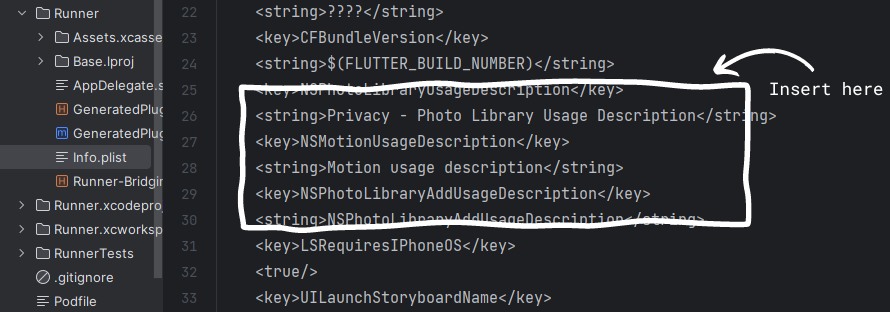
Setting Up Android
Configuring Android involves similar steps, ensuring the app has the correct permissions and SDK configurations:
Adjusting the build.gradle File
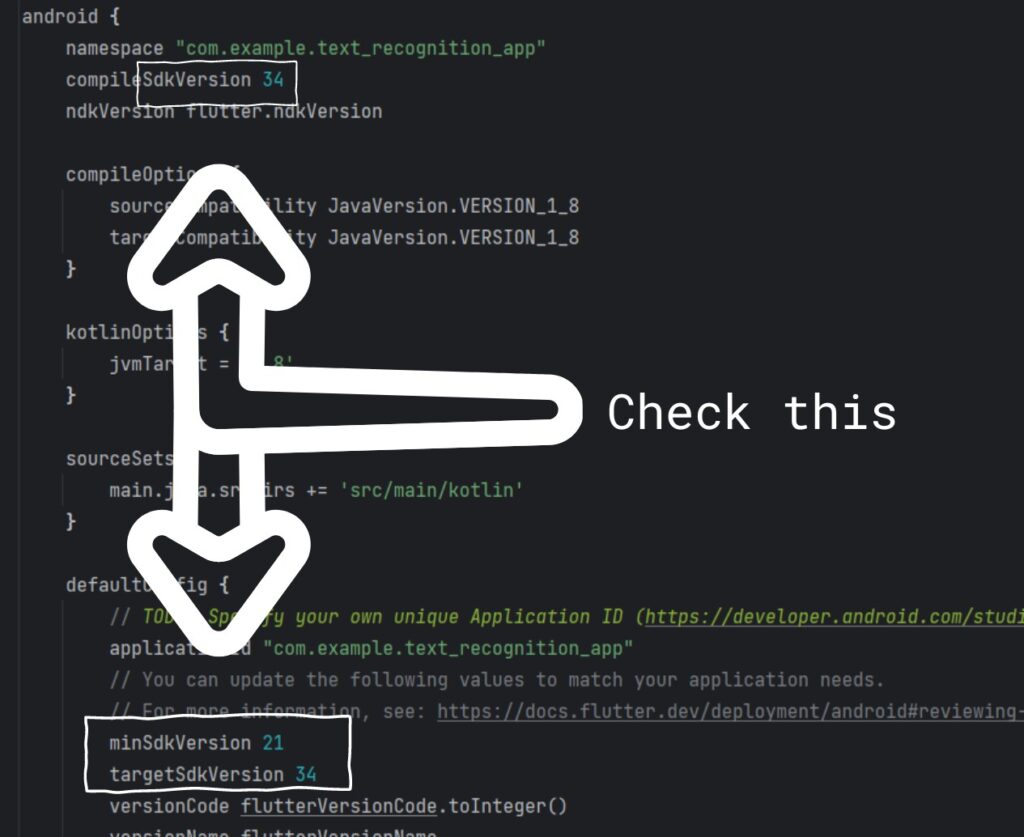
In the app’s build.gradle file:
- Set the minimum SDK version to 21 to ensure wide compatibility with Android devices.
- The target and compile SDK versions should be set according to the latest available SDKs (i.e. 34) to leverage new features and optimizations.
Configuring Android Manifest
- Just like iOS, Android requires specific permissions to access media files.
- Add permissions for
READ_EXTERNAL_STORAGE,READ_MEDIA_IMAGES, andREAD_MEDIA_VIDEOin theAndroidManifest.xmlfile to enable gallery access.
<uses-permission android:name="android.permission.READ_EXTERNAL_STORAGE" />
<uses-permission android:name="android.permission.READ_MEDIA_IMAGES"/>
<uses-permission android:name="android.permission.READ_MEDIA_VIDEO"/>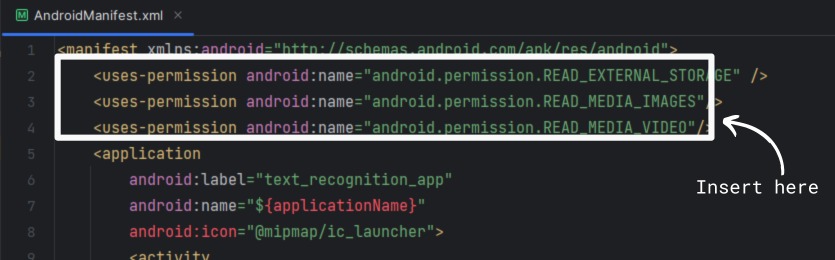
Optional Configuration for Non-Latin Text Recognition
- For applications needing to recognize non-Latin scripts like Chinese or Arabic, additional configurations may be required in the Podfile for iOS and build.gradle for Android. These include linking to specific NLP libraries and ensuring the correct language models are loaded.
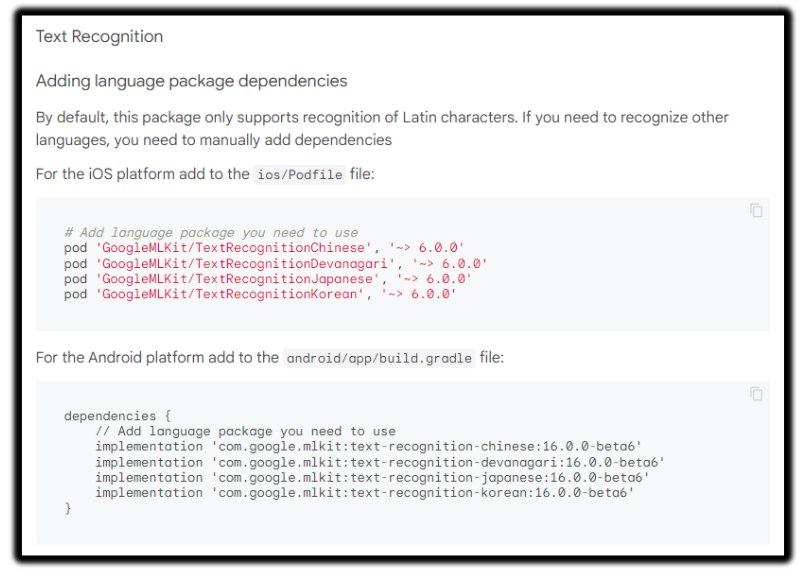
For step by step procedure click here and scroll down.
Testing the Setup
Once the setup is complete, it’s important to test the application on an actual device or simulator to ensure everything functions as intended. Note that the iOS simulator might not support the full capabilities of ML Kit due to hardware limitations, thus testing on a real device is recommended.
Implementing Image Selection
The core functionality starts with allowing the user to pick an image from their device. Following are the steps of implementation:
- Define a variable to hold the selected image file.
- Add a Floating Action Button to your app’s main scaffold which, when tapped, opens the gallery.
- Implement an
onPressedfunction that utilizes the gallery_picker package to fetch the selected image.
class _HomePageState extends State<HomePage> {
  File? selectedMedia;

  @override
  Widget build(BuildContext context) {
    return Scaffold(
      appBar: AppBar(
        centerTitle: true,
        title: const Text(
          "Text Recognition",
        ),
      ),
      body: _buildUI(),
      floatingActionButton: FloatingActionButton(
        onPressed: () async {
          List<MediaFile>? media = await GalleryPicker.pickMedia(
              context: context, singleMedia: true);
          if (media != null && media.isNotEmpty) {
            var data = await media.first.getFile();
            setState(() {
              selectedMedia = data;
            });
          }
        },
        child: const Icon(
          Icons.add,
        ),
      ),
    );
  }
Displaying the Selected Image
Display the selected image on the screen.
- Implement a function that updates the UI to show the selected image.
Widget _buildUI() {
  return Column(
    mainAxisSize: MainAxisSize.max,
    mainAxisAlignment: MainAxisAlignment.spaceEvenly,
    crossAxisAlignment: CrossAxisAlignment.center,
    children: [
      _imageView(),
      _extractTextView(),
    ],
  );
}- If no image is selected yet, display a placeholder text like “Pick an image for text generation.”
Widget _imageView() {
  if (selectedMedia == null) {
    return const Center(
      child: Text("Pick an image for text recognition."),
    );
  }
  return Center(
    child: Image.file(
      selectedMedia!,
      width: 200,
    ),
  );
}
Extracting Text from Image
The next step involves extracting text from the selected image:
- Define a function that utilizes the Google ML Kit Text Recognition package to process the image and extract text.
- Handle different scenarios like no text found or errors during processing by setting appropriate UI elements.
Future<String?> _extractText(File file) async {
  final textRecognizer = TextRecognizer(
    script: TextRecognitionScript.latin,
  );
  final InputImage inputImage = InputImage.fromFile(file);
  final RecognizedText recognizedText =
      await textRecognizer.processImage(inputImage);
  String text = recognizedText.text;
  textRecognizer.close();
  return text;
}
Displaying Extracted Text
Display the recognized text within the app:
- Use a
FutureBuilderwidget to handle asynchronous text recognition operations. - Display the recognized text or a placeholder if no text was recognized.
Widget _extractTextView() {
  if (selectedMedia == null) {
    return const Center(
      child: Text("No result."),
    );
  }
  return FutureBuilder(
    future: _extractText(selectedMedia!),
    builder: (context, snapshot) {
      return Text(
        snapshot.data ?? "",
        style: const TextStyle(
          fontSize: 25,
        ),
      );
    },
  );
}
Testing Text Recognition Functionality
Finally, test the entire flow from selecting an image to displaying the recognized text:
- Ensure the app handles different types of images and extracts text accurately.
- Test the app’s performance and usability on different devices to ensure a smooth user experience.
Get Source Code for free:
Conclusion
Implementing text recognition in Flutter opens a myriad of possibilities for app development, from enhancing accessibility features to creating data entry automation tools. By following this guide, developers can integrate robust text recognition into their Flutter applications, leveraging Google’s powerful ML Kit and Flutter’s flexible framework to build advanced, feature-rich applications. Whether for personal projects or commercial applications, text recognition can significantly enhance the functionality and appeal of your mobile apps.


Leave a Reply