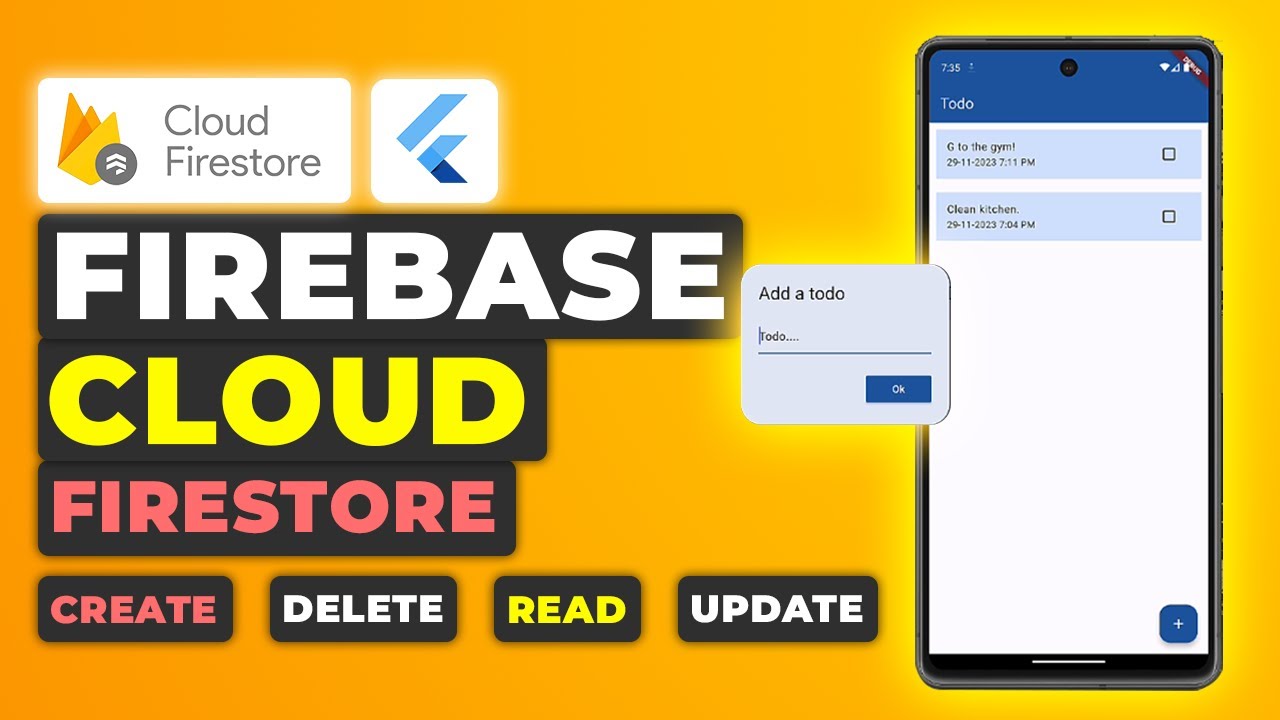
In today’s tutorial, I’m going to show you how to use Firebase’s Cloud Firestore database within your Flutter app. We’ll cover all the essential CRUD operations (Create, Read, Update, Delete) and ensure that the code is well-structured, maintainable, and type-safe. If you’re new to connecting Flutter with Firebase, don’t worry—I already have a detailed blog on my website that covers the setup and configuration process. Check it out by clicking here.
Once you have Flutter connected to Firebase, Follow along as we build a Firebase CRUD app in Flutter.
Prerequisites
Before starting, ensure you have:
- Flutter installed
- A Firebase project set up
- Basic knowledge of Flutter and Dart
If you prefer watching a video tutorial on setting up firebase in Flutter here is a link to that.
Overview
We’ll build a simple to-do application with the following features:
- View a list of to-dos
- Mark to-dos as done or undone, updating the timestamp accordingly
- Add new to-dos
Setting Up Firebase
First, initialize an empty Flutter project and run flutterfire configure to set up Firebase. Ensure that your project is connected to Firebase.
Adding Dependencies
In the pubspec.yaml file, add the necessary dependencies:
firebase_core
Firebase Core SDK for foundational Firebase services integration in Flutter. To get the dependency click here.
cloud_firestore
Firestore database for scalable mobile, web, and server development with Firebase. To get the dependency click here.
intl
Flutter library for internationalization and localization support, managing dates, numbers, and messages. To get the dependency click here.
dependencies:
  flutter:
    sdk: flutter
  firebase_core: latest_version
  cloud_firestore: latest_version
  intl: latest_version
Run flutter pub get to install the dependencies.
flutter pub getMain Application File
In main.dart, initialize Firebase and configure Firestore settings.
import 'package:cloud_firestore/cloud_firestore.dart';
import 'package:firebase_core/firebase_core.dart';
import 'package:flutter/material.dart';
import 'package:flutter_firebase_firestore_tutorial/firebase_options.dart';
import 'package:flutter_firebase_firestore_tutorial/pages/home_page.dart';

void main() async {
  WidgetsFlutterBinding.ensureInitialized();
  await Firebase.initializeApp(
    options: DefaultFirebaseOptions.currentPlatform,
  );
  FirebaseFirestore.instance.settings = const Settings(
    persistenceEnabled: true,
  );
  runApp(const MyApp());
}

class MyApp extends StatelessWidget {
  const MyApp({super.key});

  @override
  Widget build(BuildContext context) {
    return MaterialApp(
      title: 'Flutter Demo',
      theme: ThemeData(
        colorScheme: ColorScheme.fromSeed(seedColor: const Color.fromRGBO(210, 224, 251, 1)),
        useMaterial3: true,
      ),
      home: HomePage(),
    );
  }
}
Creating the To-Do Model
Define the structure of a to-do item in todo.dart.
import 'package:cloud_firestore/cloud_firestore.dart';

class Todo {
  String task;
  bool isDone;
  Timestamp createdOn;
  Timestamp updatedOn;

  Todo({
    required this.task,
    required this.isDone,
    required this.createdOn,
    required this.updatedOn,
  });

  Todo.fromJson(Map<String, Object?> json)
      : this(
          task: json['task']! as String,
          isDone: json['isDone']! as bool,
          createdOn: json['createdOn']! as Timestamp,
          updatedOn: json['updatedOn']! as Timestamp,
        );

  Todo copyWith({
    String? task,
    bool? isDone,
    Timestamp? createdOn,
    Timestamp? updatedOn,
  }) {
    return Todo(
        task: task ?? this.task,
        isDone: isDone ?? this.isDone,
        createdOn: createdOn ?? this.createdOn,
        updatedOn: updatedOn ?? this.updatedOn);
  }

  Map<String, Object?> toJson() {
    return {
      'task': task,
      'isDone': isDone,
      'createdOn': createdOn,
      'updatedOn': updatedOn,
    };
  }
}
Creating the Database Service
Create a database_service.dart file to handle database operations.
import 'package:cloud_firestore/cloud_firestore.dart';
import 'package:flutter_firebase_firestore_tutorial/models/todo.dart';

const String TODO_COLLECTON_REF = "todos";

class DatabaseService {
  final _firestore = FirebaseFirestore.instance;

  late final CollectionReference _todosRef;

  DatabaseService() {
    _todosRef = _firestore.collection(TODO_COLLECTON_REF).withConverter<Todo>(
        fromFirestore: (snapshots, _) => Todo.fromJson(snapshots.data()!),
        toFirestore: (todo, _) => todo.toJson());
  }

  Stream<QuerySnapshot> getTodos() {
    return _todosRef.snapshots();
  }

  void addTodo(Todo todo) async {
    _todosRef.add(todo);
  }

  void updateTodo(String todoId, Todo todo) {
    _todosRef.doc(todoId).update(todo.toJson());
  }

  void deleteTodo(String todoId) {
    _todosRef.doc(todoId).delete();
  }
}
Building the Home Page
Create a home_page.dart file for the UI and CRUD operations.
Importing Dependencies
import 'package:cloud_firestore/cloud_firestore.dart';
import 'package:flutter/material.dart';
import 'package:intl/intl.dart';

import '../models/todo.dart';
import '../services/database_service.dart';
Creating a Stateful Widget
Define the HomePage stateful widget:
class HomePage extends StatefulWidget {
  const HomePage({super.key});

  @override
  State<HomePage> createState() => _HomePageState();
}

class _HomePageState extends State<HomePage> {
  final TextEditingController _textEditingController = TextEditingController();
  final DatabaseService _databaseService = DatabaseService();
Building the Scaffold
Build the main structure of the home page:
  @override
  Widget build(BuildContext context) {
    return Scaffold(
      resizeToAvoidBottomInset: false,
      appBar: _appBar(),
      body: _buildUI(),
      floatingActionButton: FloatingActionButton(
        onPressed: _displayTextInputDialog,
        backgroundColor: Theme.of(context).colorScheme.primary,
        child: const Icon(
          Icons.add,
          color: Colors.white,
        ),
      ),
    );
  }
}
Building the UI
Set up the UI components including the AppBar, main UI, and the list view.
Creating the AppBar
PreferredSizeWidget _appBar() {
  return AppBar(
    backgroundColor: Theme.of(context).colorScheme.primary,
    title: const Text(
      "Todo",
      style: TextStyle(
        color: Colors.white,
      ),
    ),
  );
}
Setting Up the Main UI
Widget _buildUI() {
  return SafeArea(
    child: Column(
      children: [
        _messagesListView(),
      ],
    ),
  );
}
Displaying the List of To-Dos
Widget _messagesListView() {
  return SizedBox(
    height: MediaQuery.sizeOf(context).height * 0.80,
    width: MediaQuery.sizeOf(context).width,
    child: StreamBuilder(
      stream: _databaseService.getTodos(),
      builder: (context, snapshot) {
        List todos = snapshot.data?.docs ?? [];
        if (todos.isEmpty) {
          return const Center(
            child: Text("Add a todo!"),
          );
        }
        return ListView.builder(
          itemCount: todos.length,
          itemBuilder: (context, index) {
            Todo todo = todos[index].data();
            String todoId = todos[index].id;
            return Padding(
              padding: const EdgeInsets.symmetric(
                vertical: 10,
                horizontal: 10,
              ),
              child: ListTile(
                tileColor: Theme.of(context).colorScheme.primaryContainer,
                title: Text(todo.task),
                subtitle: Text(
                  DateFormat("dd-MM-yyyy h:mm a").format(
                    todo.updatedOn.toDate(),
                  ),
                ),
                trailing: Checkbox(
                  value: todo.isDone,
                  onChanged: (value) {
                    Todo updatedTodo = todo.copyWith(
                        isDone: !todo.isDone, updatedOn: Timestamp.now());
                    _databaseService.updateTodo(todoId, updatedTodo);
                  },
                ),
                onLongPress: () {
                  _databaseService.deleteTodo(todoId);
                },
              ),
            );
          },
        );
      },
    ),
  );
}
Adding a New To-Do
Display an input dialog to add a new to-do:
void _displayTextInputDialog() async {
  return showDialog(
    context: context,
    builder: (context) {
      return AlertDialog(
        title: const Text('Add a todo'),
        content: TextField(
          controller: _textEditingController,
          decoration: const InputDecoration(hintText: "Todo...."),
        ),
        actions: <Widget>[
          MaterialButton(
            color: Theme.of(context).colorScheme.primary,
            textColor: Colors.white,
            child: const Text('Ok'),
            onPressed: () {
              Todo todo = Todo(
                  task: _textEditingController.text,
                  isDone: false,
                  createdOn: Timestamp.now(),
                  updatedOn: Timestamp.now());
              _databaseService.addTodo(todo);
              Navigator.pop(context);
              _textEditingController.clear();
            },
          ),
        ],
      );
    },
  );
}
Running the Application
With everything set up, run your application. You should see an app with a to-do list, a search bar at the top, and functionalities to add, update, and delete to-dos.
Get Source Code for free:
Conclusion
In this tutorial, we built a Flutter application with Firebase that allows CRUD operations on a to-do list. This functionality is essential for creating dynamic and user-friendly applications.
Happy coding


Leave a Reply